Ok so Susan who runs
http://shop.mohairwig.com/ happens to live literally down the street from me. And, as a doll modder/prospective buyer I totally got to hang out and just chat with her about dolls, wigs, clown hair, and how much stock she has. It's...amazing. So, as I have never made a wig before, I got all kinds of pointers from her. I then made a wrong wig (of course) followed by a more successful try.
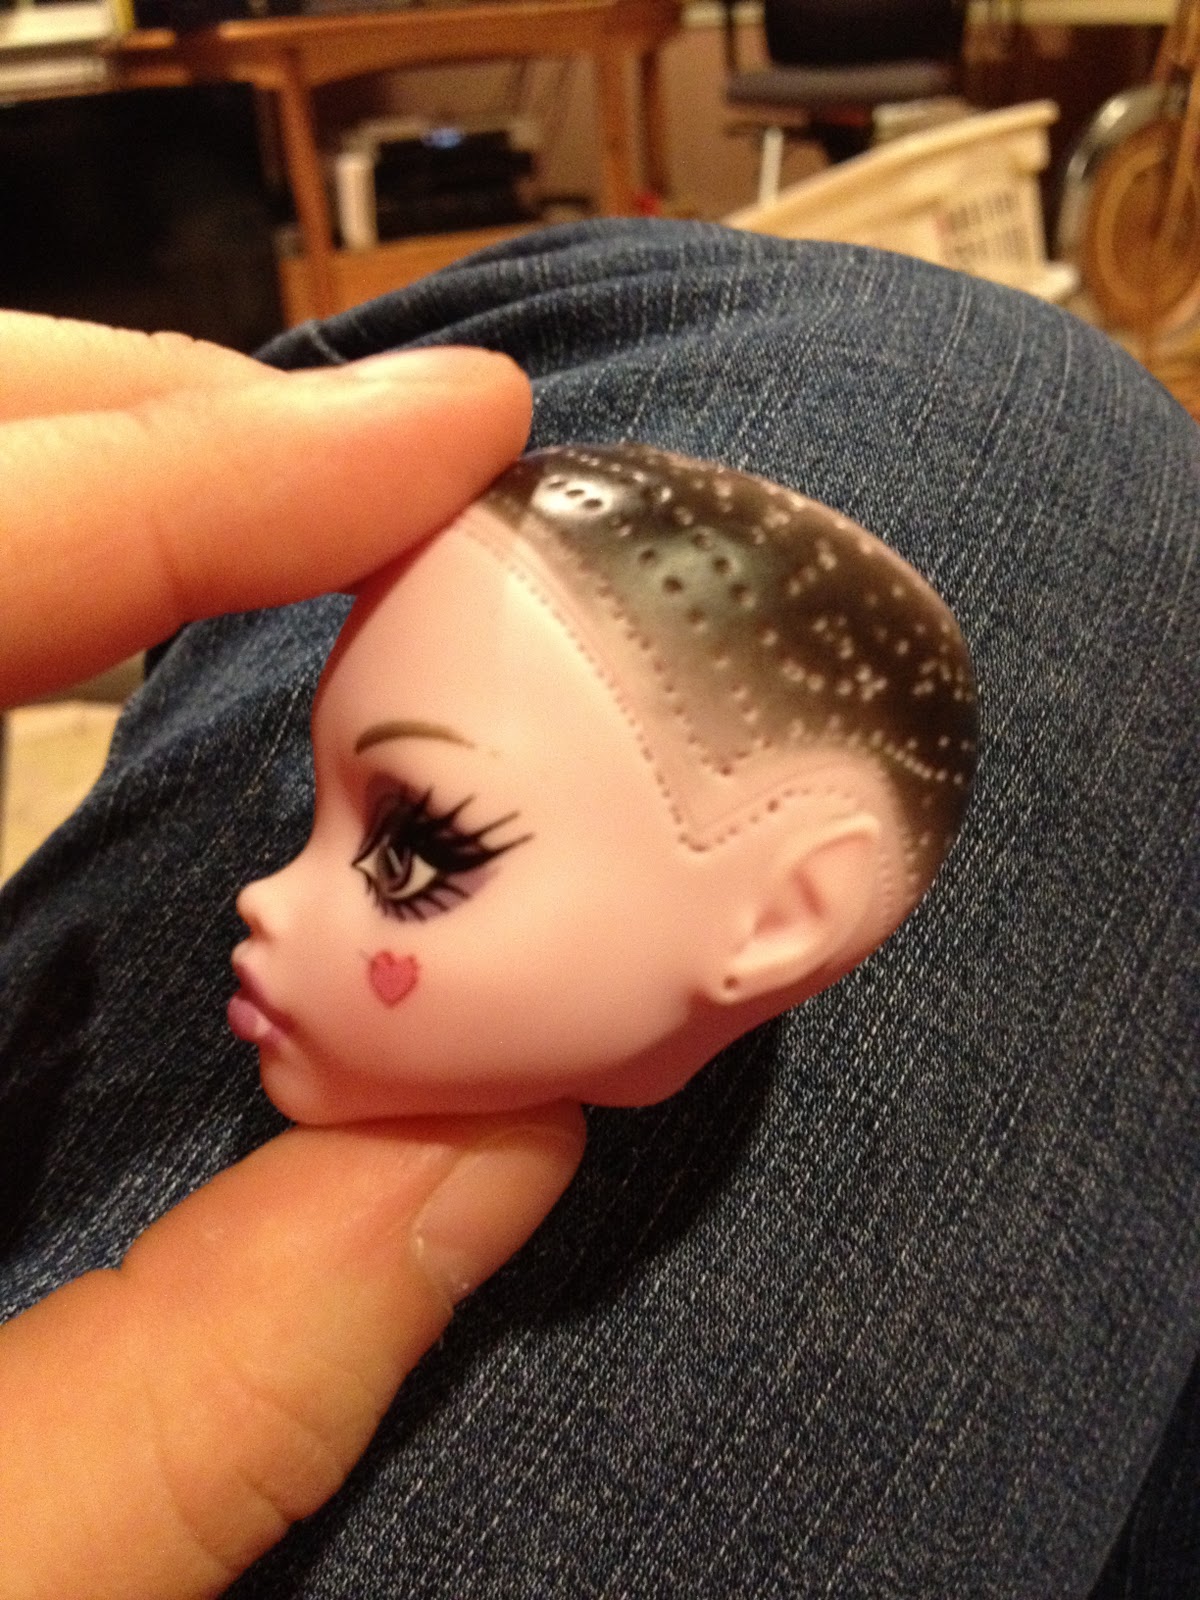
First up, you want to plastic wrap your head (if it's expensive) so that you can get it wet. You don't really wanna use a faceuped BJD, or at least I don't, but I had a few blank decapitated Monster High girls wandering around so tadah, perfect models.
What you want is thin linen or muslin, literally like something very loose woven that will lie flat when wet. What I used was jersey. Jersey is the absolute INCORRECT material to use for this. But again, I like to make lots of mistakes and then figure it out after. So, cut a hunk of fabric and literally wet it with a white glue/water mixture. Solid glue is too tacky and straight water won't hold once it dries. You want probably closer to a 60/40 - 70/30 glue to water mixture but I guesstimated and got something around I have no idea. Why is this important? Because if you get it wrong (like I did) it will take at least seven lifetimes to dry.
Alright so, with your wetted glue fabric, drape it over her head and flatten it, folds and everything, to get it to lay flat. And then, just let it dry. I didn't take pictures of this because I got distracted watching terrible reality TV and honestly I take pictures with my iPhone anyway because I'm lazy.
So once it's dry (which I cheated by using a freaking hairdryer because again, don't use jersey) you get a sort of hard cap. And you can cut it to have the right hairline, ear holes, whatever you need. If you need it longer in the back then leave the back longer, however you wanna adjust it.
She's about ready to play football now. Ok so the next step would be to get it OFF the head which honestly I thought would be harder. I sort of just peeled it off her head and amazingly it was still this kind of hard cap shape.
Ok so the next step is the important one. You need to cut it to lay flat. And I wrote an F on my pattern for what I THOUGHT was the front but it was a lie. The 3 piece pattern I made actually has a seam in the FRONT and so the F I put down is in fact, the back. Yeah. Guess who didn't figure that out until AFTER the fact. I make mistakes so you don't have to.
Ok so, if you want to make a wig and don't mind that the seam is in the front then you can totally make it into three pieces and it will lay flat and it will be fine as long as you cut precisely sew precisely and do all kinds of things correctly which I did not do. But if you want a wig without a seam in the front then you need to mark what is the front of the cap and then make cuts in it along the sides until you can get it to lie flay without mucking up the front part. Since I have to make ANOTHER wig (for a Medusa project) I intend on trying this again. Hopefully with the right fabric and material and actually paying attention to what the hell I am cutting thsi time.

This is where I fucked up. I cut the skin from the back with an exacto (correctly) but I cut the pattern LARGER than my headcap. Yeah. Why I don't know. I thought maybe seam allowance. This is WRONG. Wrong wrong wrong. You want to cut it exactly the same size (except possibly and juuuuuust possibly the very front where you want to fold the flap down and glue it but that makes the wigcap more pleasing to see against the forehead. The important thing however is don't add seam allowances everywhere. In fact, if you're worried, don't add them at all. Or you will do what I did and find out only after you have sewn it that the damn thing is 5 sizes too big for her stupid big head.

Yup. Don't cut it bigger than your pattern. You made a wigcap for a reason. That reason was for the wig to fit her head. Don't then do what I did and TOTALLY IGNORE IT. If you are nervous it will not fit, really quickly sew together your glue fabric wigcap, throw it back on her head, and see if it fits the way you want it to.
Ok so, I have no idea what this stitch is actually called but I wanna go with overhand. In any case, it's easier to hand sew through skin than try to do it on the machine and also, use the proper tools. Which, again, I never do. The correct way to do it would be with a sharp needle and a thimble. I lacked both of these things so it took me ages, but I am noting this so you can avoid my (increasingly numerous) errors.
When you finish sewing it, you can take fabric glue (brand is Fabri-tac I believe, I got this from Susan because I'll be damned if I've ever worked with lambskin before) lay a line down, then fold over your front edge and hold it for a minute. This just makes the front of your wig more aesthetically pleasing and so you don't see the edge of the wigcap being all weird and stuff.
Tadah! Finished wig. On a head. That is on a pen. Nothing weird about that. This particular fur has been stuck in a bag for awhile and so I need to spritz it with water and brush it out using, oddly enough, a dog brush. And then because it's actually hair you can style it with real hair product.
There is another method of wig making in which you make hair weaves and sew or glue those to the wig cap itself so instead of having to sew a skin you only make the cap and then attach the hair the way you want to. Bit more time consuming but you have muuuuch more control over how poofy/thin/styled you want it to be. I have all the stuff and even instructions on how to do this, I just need to get the drive to actually do it. But when I do (and make a million errors in the process) I will document it and throw it up here.
Now for something completely different: progress pictures of a Cleo head that I am going to turn into an Amazon warrior.
First layer she gets, and this is in order because I am insane, eyeshape, eyebrows, lip color basics, and the outline shape of her facepaint stripe. How long does it take to do eye shape? Longer than I want to admit. I start with the left side because I am better at the right (counter intuitive right?) because if I get the left side to something I like, then I can generally match it on the right. I can't match worth a damn on the left. Same with eyebrows, I start with the side I am shittier on.
Second layer gets more lip color. I added too much purple and blue the first time and went more red and brown the second because I dunno, she's an Amazon she doesn't need purple makeup. I also do my liner in black and I tried out eyelashes but decided if I was gonna do Kabuki-style makeup then I wasn't gonna also give her tiny lashes. It seemed like overkill.
And finished makeup and gloss. Conclusion? Holy crap is it easier to paint dolls with closed eyes. The eyeshape part is fine and the brows are fine but when you get to that pupil shit that's when I muck everything up. I need practice for that. Definitely.
And with a mohair wig that's got some fancy beads thrown into it because again, Amazon warrior. She needs some decoration. Next step? Body tattoos. Because when I say I am done with making tiny tattoos what I actually mean is I think they look really neat and that my dolls look naked without them so OF COURSE I am going to do them again even when I say I am never going to do it again. She'll get tribal ones in black though. No more blue henna. There's a difference...kind of.
Next project slot: body tattoos for the tan warrior woman because I hate myself (apparently), and finish sculpting wings for the succubus. Whether they stay clay or they get casted I am not so sure yet.
Happy modding!
Sam